The original MS-DOS M.A.X. Scenario Editing Process
Debug builds of M.A.X. incorporated several features that in combination enabled the original developers to create the scenario and campaign missions for the game within the game itself. M.A.X. Port reintegrated all of these features into Debug builds. The video demonstrates how to create a new stand alone mission.
Used Debug Features
The first feature is the debug panel within the preferences window. This can be enabled via the settings.ini file’s special [Debug] ini section. The section must be the first in front of the ini file.
[DEBUG]
debug=0
all_visible=0
disable_fire=0
quick_build=0
real_time=0
debug Enable the debug settings within the preferences window.

The menu allows to change the type of players too. A value of 1 means a human player, a value of 2 means computer player a value of 0 means the player is disabled.
The complete list of possible values is as follows, but some are not meaningful to set within this use case.
  TEAM_TYPE_NONE = 0,
  TEAM_TYPE_PLAYER = 1,
  TEAM_TYPE_COMPUTER = 2,
  TEAM_TYPE_REMOTE = 3,
  TEAM_TYPE_ELIMINATED = 4,
all_visible This is not the same as the in-game cheat [MAXSPY], this setting actually reveals all to every player in-game.
disable_fire Prevent all unit attacks. Can be toggled in game via the debug menu.
quick_build Every unit and building costs 1 material to build, therefore 1 turn to build, for every player in-game.
real_time Switches to real time mode where units have no speed points per turn, instead their speed points determine their travel speed. Can be toggled in game via the debug menu.
For the scenario editing use case I found the debug, quick_build and real_time parameters very useful while I do not like to use the all_visible parameter. To activate any of these just change their values from 0 to 1.
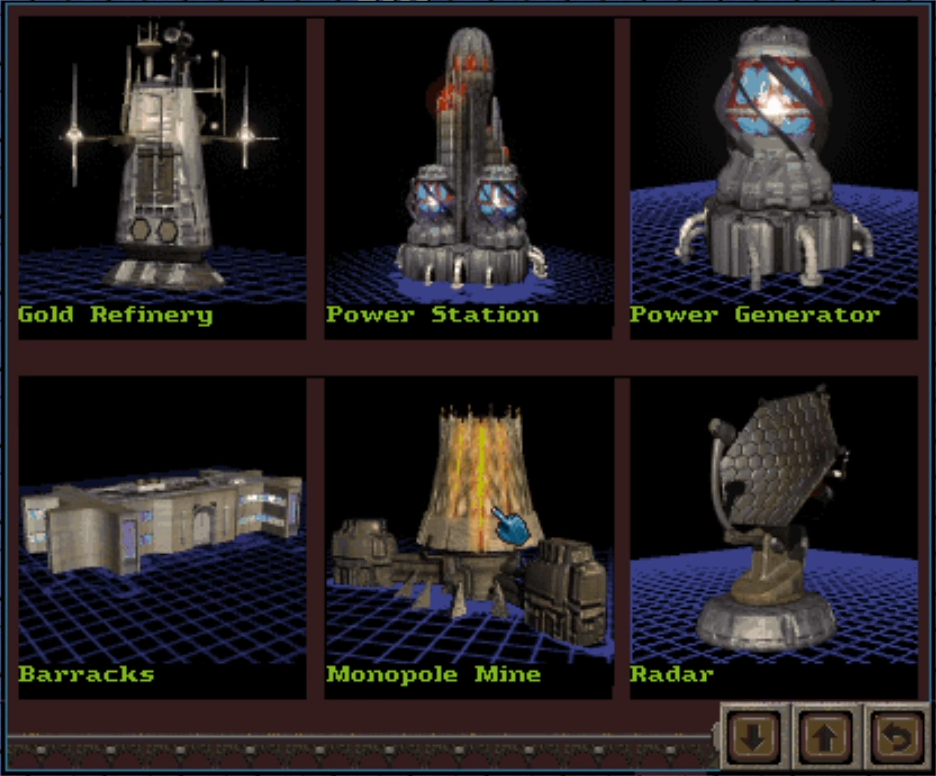
The second feature is the quick build menu which allows to deploy or remove any unit that is available in game. Note that this is a debug feature so it is quite buggy and could break if the user wants to do “sophisticated” things. To activate the quick build menu hit ALT + Z or ALT + Y depending on your keyboard locale. To go back to the menu after selecting a unit press ESC. Press ESC a second time to exit the menu. To place a unit left click with the mouse pointer. To remove any unit under the mouse pointer press right click while the quick build mode is active.

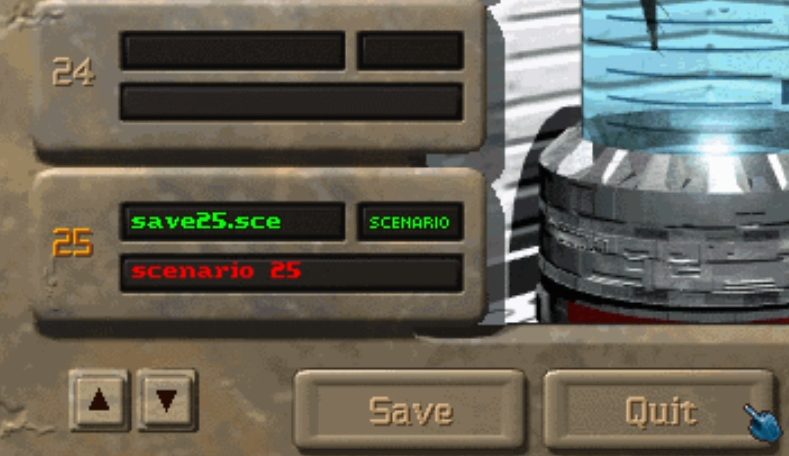
The third feature is the save file type selector interface which allows to change the normal save file type into any other type.

To activate the interface press F1 or F2 within the in game File menu. F1 increments the file type by one decimal value, F2 decrements it by one. E.g. if the current menu shows GAME_TYPE_CUSTOM files, pressing F1 switches to GAME_TYPE_TRAINING files.
The complete list of possible values is as follows, but some of them are not meaningful to set within this use case.
  GAME_TYPE_CUSTOM = 0x0,
  GAME_TYPE_TRAINING = 0x1,
  GAME_TYPE_CAMPAIGN = 0x2,
  GAME_TYPE_HOT_SEAT = 0x3,
  GAME_TYPE_MULTI = 0x4,
  GAME_TYPE_DEMO = 0x5,
  GAME_TYPE_DEBUG = 0x6,
  GAME_TYPE_TEXT = 0x7,
  GAME_TYPE_SCENARIO = 0x8,
  GAME_TYPE_MULTI_PLAYER_SCENARIO = 0x9
The title screen starts an attract demo after 60 seconds of idling. The first few CD-ROM releases, like CD-ICD-082-EU, had only a single dmo map, but later CD-ROM releases, like CD-ICD-082-1, added two additional maps for variety. If you want to create such attract demos use the GAME_TYPE_DEMO save file type.
The GAME_TYPE_TEXT format saved games in human readable text format for easy editing, but as the original developers abandoned the format during development now it is not supported anymore. Use ImHex and the M.A.X. save file profile to hack save game files, e.g. to change a unit’s stored raw amterials or hit points or to remove messages from the in game message log.
The GAME_TYPE_DEBUG format saved games were made during desynchronization issues in network play. They are pretty much useless for this use case.
To create stand alone missions, use GAME_TYPE_SCENARIO. To create campaign missions use GAME_TYPE_CAMPAIGN.
Tips & Tricks
-
Every saved game file, or mission has a decimal mission index that is equal to their save game slot when the mission is exported via the save file type selector interface. E.g. above I used slot 25 which sets the mission index to 25. The Save File Format article describes the unique mission Victory and Loss Conditions. E.g. to create a stand alone mission that is won as soon as Green Team has no Research Centers left, use save slot 18 to “export” the mission, and then rename it to a free file slot, e.g. rename the file to
SAVE25.SCEand create a mission briefing for it with a text file calledDESCR25.SCE. The mission index will remain to be 18 having unique victory and loss conditions. -
It is possible to use the Hot Seat game mode to create missions to make it sure that computers do not do anything while we are editing the map, but then we cannot use any of the cheat codes as the game will punish us direly. Keep in mind that when we change the team type via the debug menu we end up in the same situation, BUT it is important that we can activate cheat codes with a single human player and then we are free to change the team types afterwards as the punishment only comes when we perform a cheating event with human player count greater than 1.
-
Aircrafts are placed onto the ground by the quick build menu! If we want them to hover, to fly, we need to make them move.
-
If we want to make it sure that all units start with maximum speed points, we can activate the real time mode in the debug menu.
-
Any campaign mission could have a mission briefing screen as well as a victory briefing screen. We just need to create files like
INTRO<mission index>.CAMorWIN<mission index>.CAM. E.g.INTRO25.CAMwould be shown before campaign mission 25.